How-to · Facade
How to add defects during a facade inspection
Walk through defect capture on a live OPUS Demo inspection. From Continue inspection to a filled Add Defect form, severity bands, and the live register.
Defect capture is the core of a Veritas Facade inspection. Every finding should carry a type, severity, priority band, location, and enough detail that a remediation package can be scoped without a second site visit.
This guide was written from a live walkthrough on the OPUS Demo workspace using DEMO-FAC-001. We reopened the inspection, added a high-severity spalling defect on the North elevation, and confirmed it in the defect register.
Step-by-step
- 1. Open the inspection
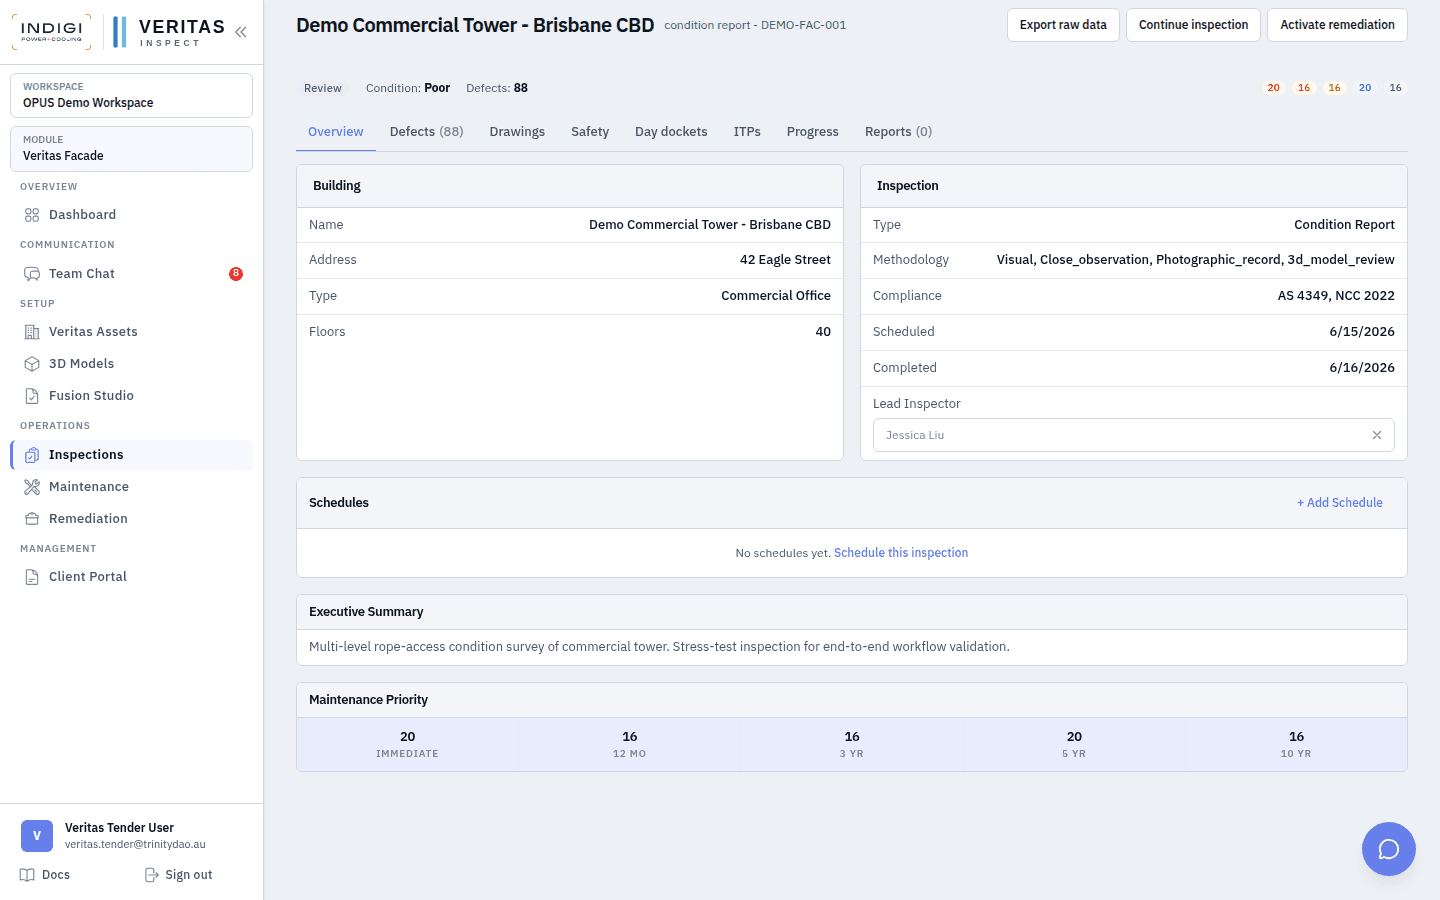
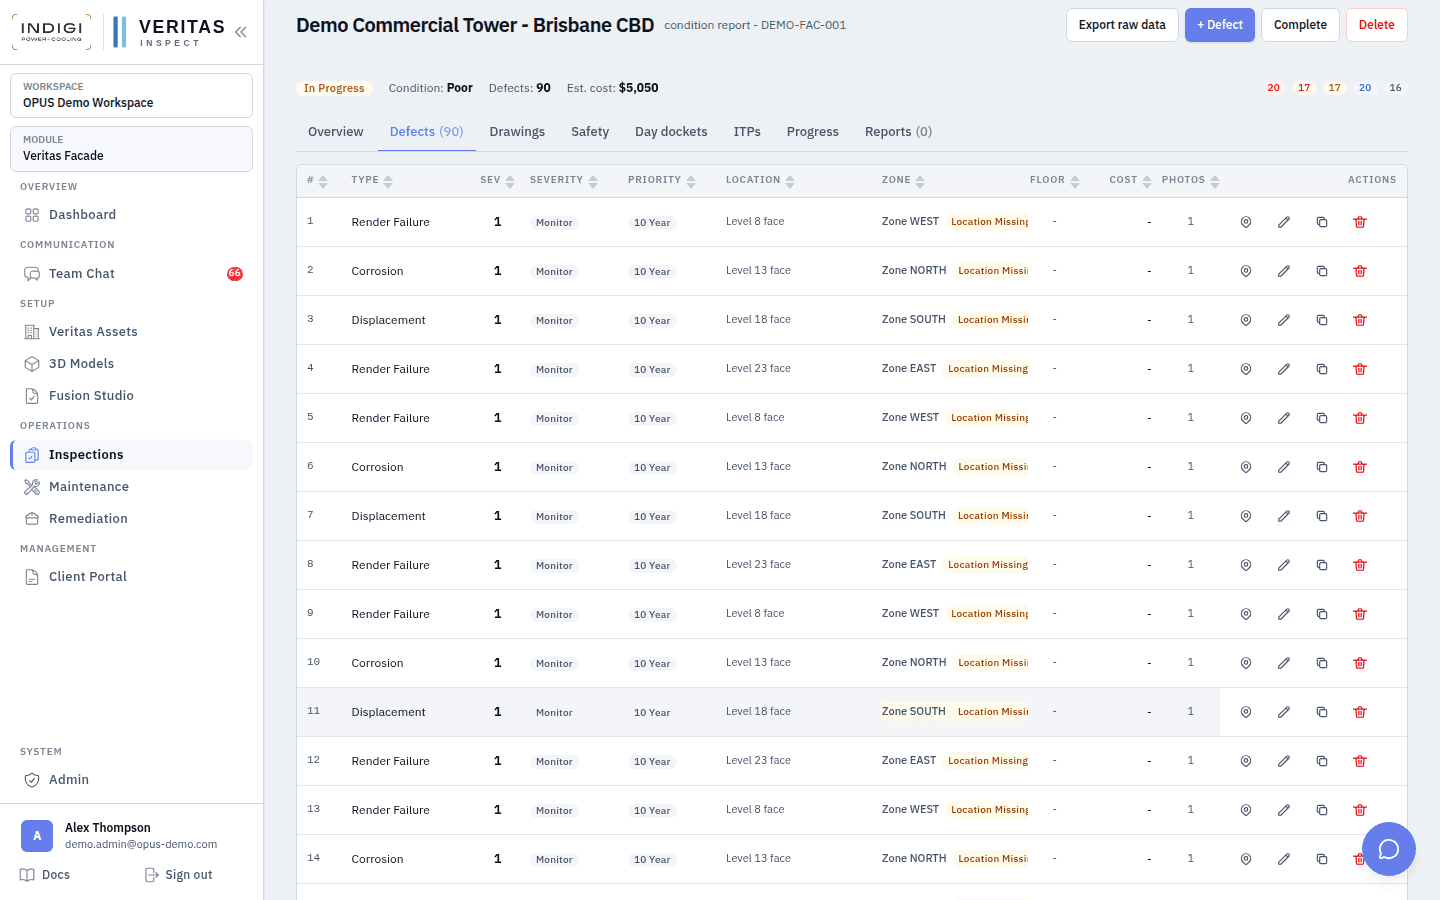
From Operations → Inspections, open the job (for demo: DEMO-FAC-001). Confirm building, type, methodology, and status on the Overview tab. Priority chips at the top show how findings are already banded across Immediate through 10 Yr.
- 2. Put the job into capture mode
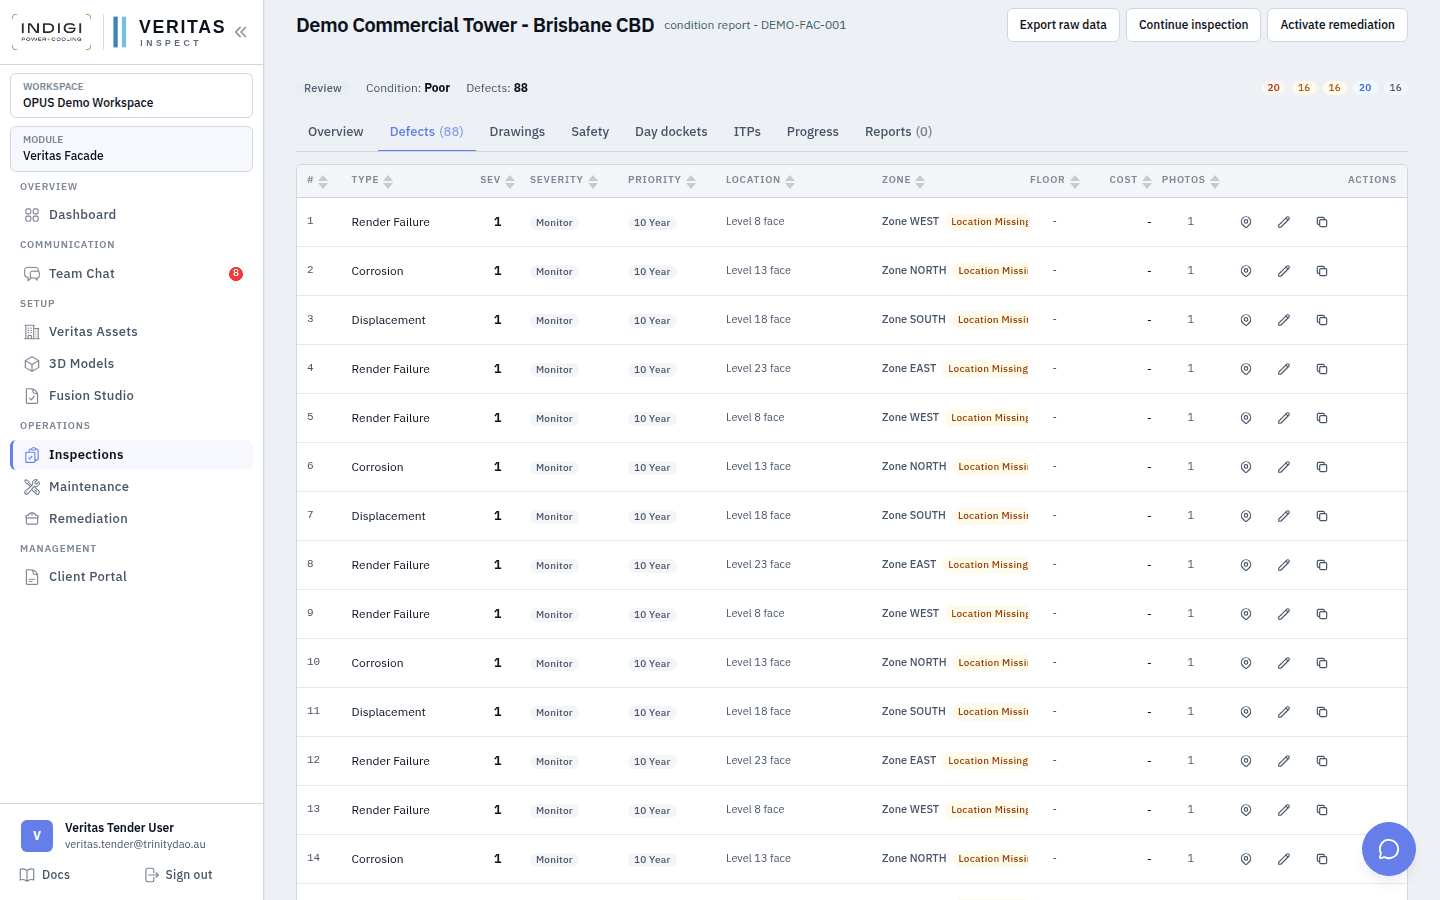
If status is review or approved, click Continue inspection. That moves the job to in progress and reveals the + Defect action in the header. Capture is intentionally gated so approved findings stay locked until someone deliberately reopens the job.
Tip: Completing an inspection later asks for overall condition and an executive summary before returning to review.
- 3. Click + Defect
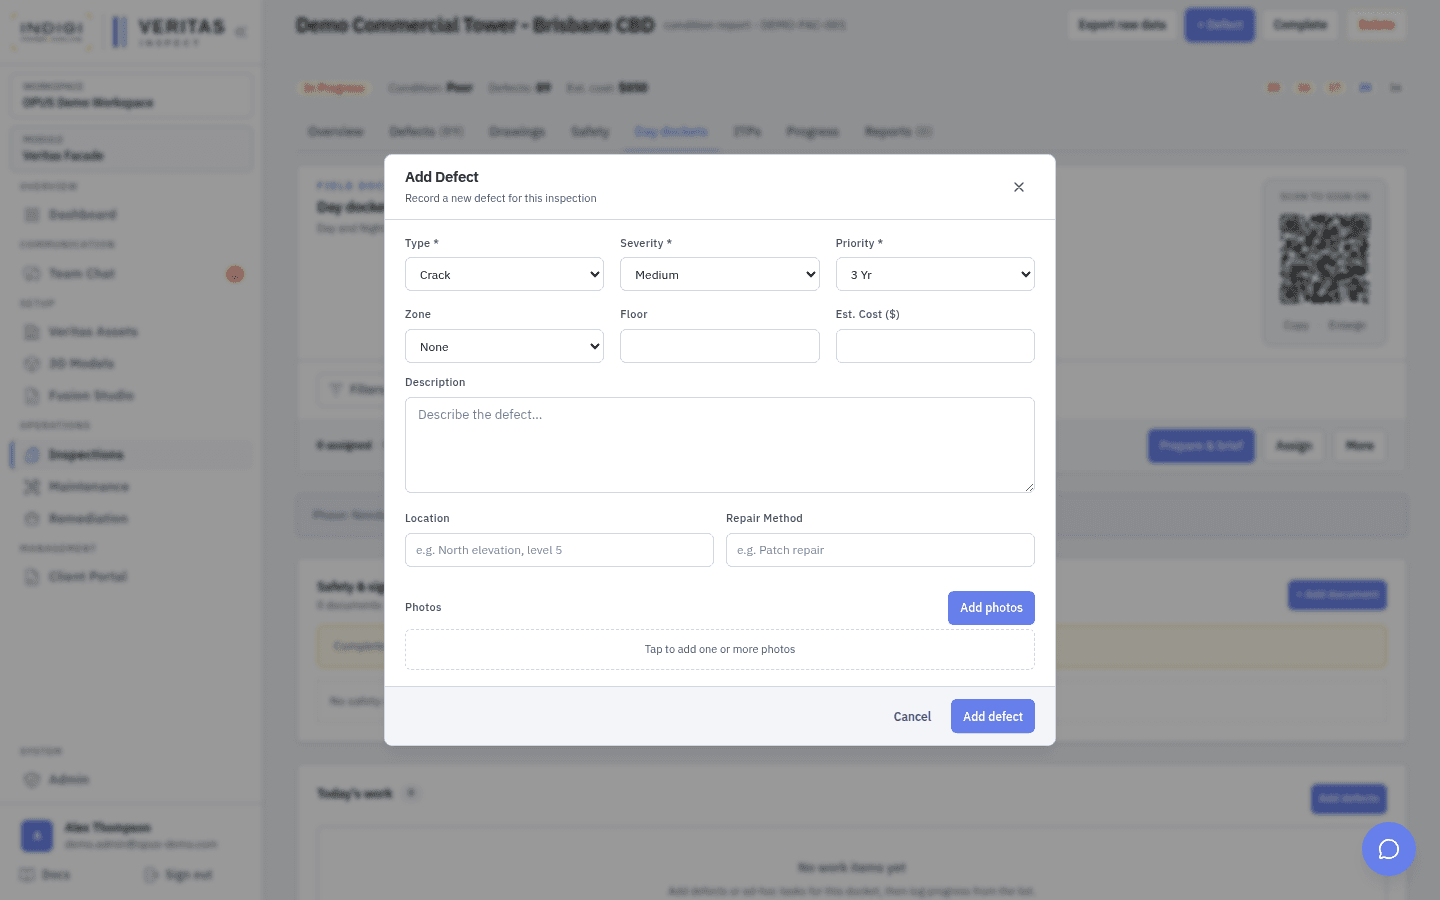
The Add Defect modal opens over the inspection. Required fields are Type, Severity, and Priority. Optional but strongly recommended: Zone, Floor, Est. Cost, Description, Location, Repair Method, and Photos.
- 4. Classify the finding
Pick the closest defect type (Crack, Spalling, Sealant Failure, Water Ingress, and more). Set Severity (Critical → Monitor) and Priority (Immediate, 12 Mo, 3 Yr, 5 Yr, 10 Yr). Severity describes urgency of risk; priority describes the maintenance planning band used in reports and budgeting.
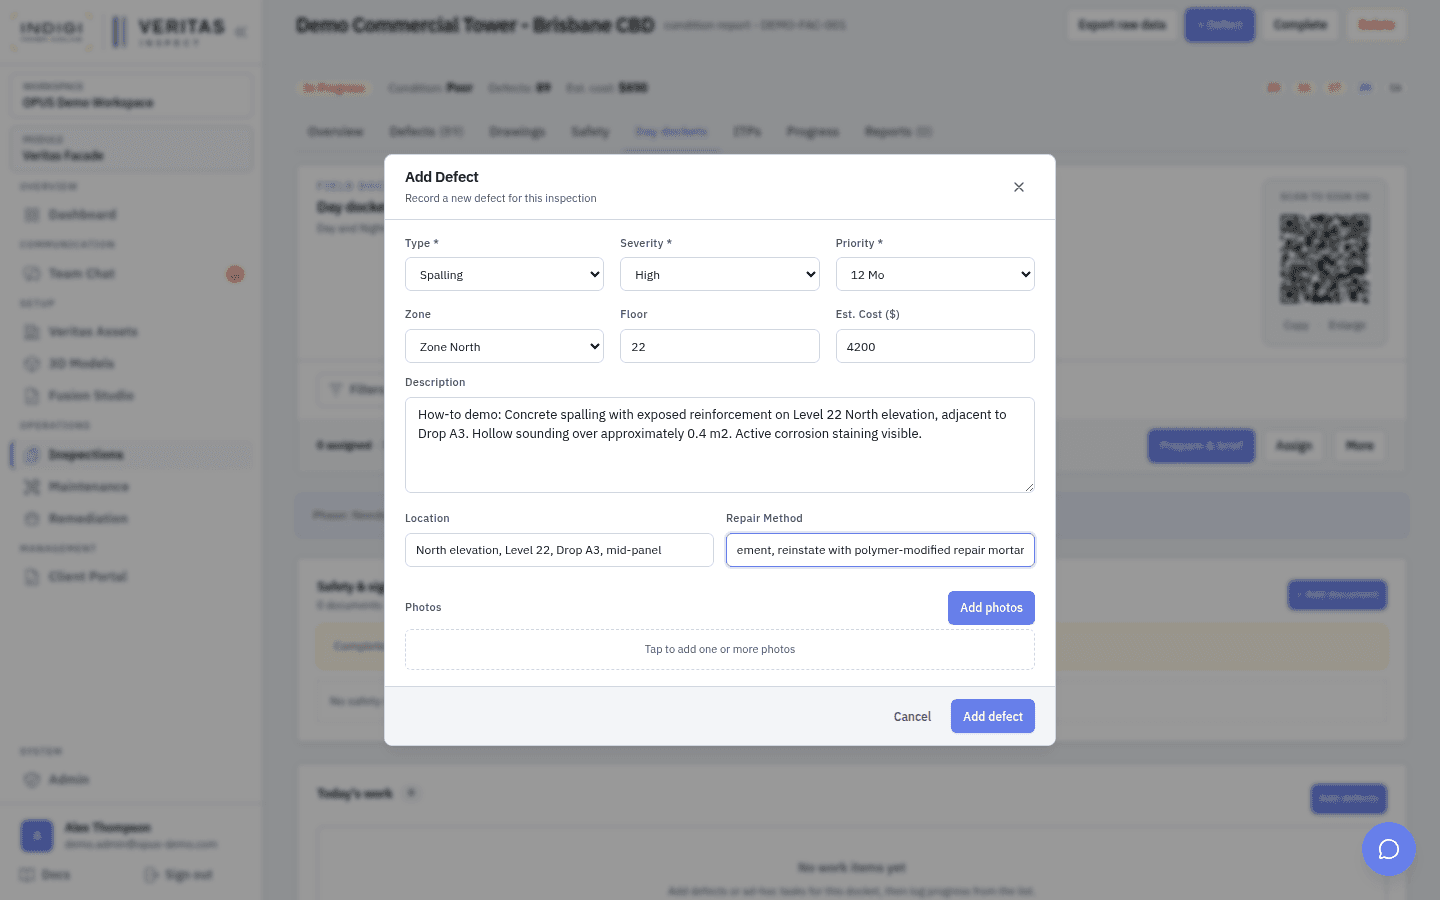
Tip: On demo we logged Spalling / High / 12 Mo on Zone North, Floor 22, with an estimated cost of $4,200.
- 5. Write location and repair intent
Location should name elevation, level, and drop when known (for example: North elevation, Level 22, Drop A3, mid-panel). Repair Method is the recommended action, not a contractor quote. Keep language factual so AI polish and remediation scoping can reuse it.
- 6. Attach photos and save
Use Add photos for close-range evidence. Click Add defect. The modal closes and the Defects tab refreshes with the new row. Counts on the header (Defects, Est. cost, priority chips) update immediately.
- 7. Review in the register
Open the Defects tab to filter, sort, and open individual findings. The register is what remediation activation, client portal views, and reports draw from. Treat incomplete rows as unfinished field work.
In the product
Screens from the OPUS Demo walkthrough
Best practices
- One physical finding = one defect row. Split clusters that need different repair methods.
- Always set Zone and Floor when the building has facade zones. It unlocks elevation overlays and drop-level planning.
- Prefer Immediate / Critical for falling hazards above public areas, even if the patch area is small.
- Capture photos on site. Retro-uploading from a shared drive loses GPS and timing context.
- Do not invent custom severity labels. Stick to Critical, High, Medium, Low, Monitor so portfolio reporting stays consistent.
See it on a live demo workspace
Book a walkthrough of OPUS Demo and we will run defects, drops, dockets, maintenance, and remediation on real projects.